Try and tell me it ain't a GREAT time to be in
the Modeling hobby!!
POLAR LIGHTS' continues to re-issue all the old AURORA favorites!
And it was with great joy when I saw this old favorite glaring down
off the Hobby shelf!! So let's rip that outer wrapper off this puppy
and get to work!!...
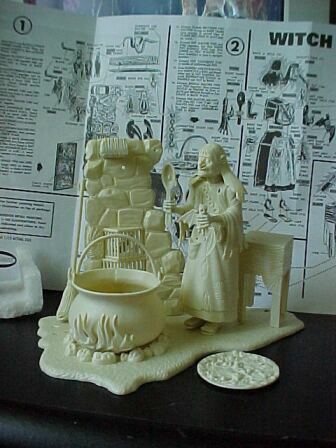
~ Preliminary Buildup ~
A quick study of the instruction sheet tells me there'll be alot of
preliminary painting to do before the numerous pieces of the base can
be put together!
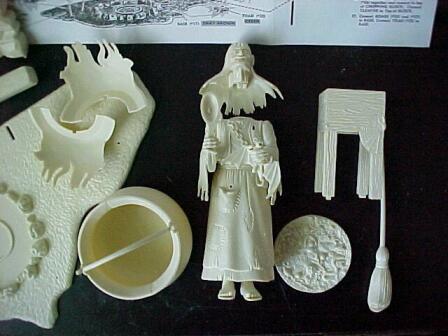
My initial approach was to put the individual pieces together. The
log for the back wall, the kettle, table, the broom, her hat, and the
hanging rat.


For the witch herself, you can take different approaches on this. Whatever
makes you comfortable. I left her head off because her hair drapes down
over her shoulders. This will make it easier to paint her shoulders
and back.
You might decide to leave her arms off, since the shaw and the bat
cover areas somewhat. But in test fitting, I felt I could get up inside
with no problem, so I glued them on.
Update: Getting a brush inside those portions
of her inner shaw, underneath her arms, is tricky! If you know what
color you want her shaw to be, you might want to paint that portion
prior to gluing on the arms. Again, it's not impossible to get them
if you have a nice small brush, but definately easier!
I did notice that where her head meets the bottom of the neck will
need putty work to hide the seam. So I'll paint everything on her upper
body except for the 'V' of her neck. Once dry, glue her head on, fix
up the seam and then continue painting.
I also test fitted everything together, to see where I want to MASK
off prior to painting the base.
For example, where the logs/fire pieces sit on the base will be masked
off prior to the primer coat. Where her feet go and also where the back
wall touches the base.
Note: when testing fitting the boiling
stew piece inside the pot, the fit isn't that good. It had a tendency
to fall into the pot...which isn't a problem when the pot isn't glued
together yet, but the way my luck runs, once glued, I know it will fall
down in there and I'll have a bear of a time getting it out!
So I cut out two cross pieces off the discarded sprue and glued them
into the pot!

Check for any seams that need attention and then start Prime Coating.
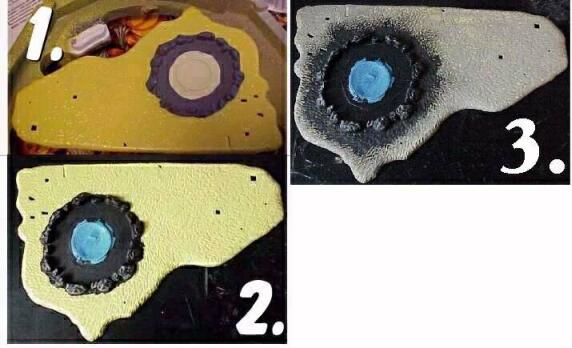
~ Painting the Base ~
Start off by masking off the rocks, then spray the base with Yellow
(1).
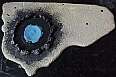
Remove the masking from the rocks, and paint the middle Black, using
a drybrush motion on the front of the rocks, to let some of the dark
gray primer show through (2).
Then I mixed up colors til I got a nice mud mixture and pretty much
went over almost all the yellow in a heavy-handed drybrush motion. Took
Black and made a soot circle around the stones..heavy Black near the
stones, and then with a drybrush/dabbing motion as it went out (3).
(Go back with a completely clean brush and buffer down the black to
make it not stand out so much, blending it into the floor).


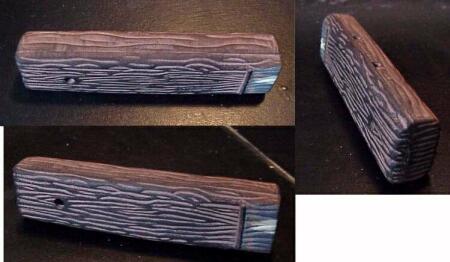
Paint the table and the wooden beam a Tan color. Then a nice dark Brown
Oxide and drybrush over the grain.
For the bottom portion of the beam, since
it hangs over the kettle, I drybrushed in black to give the appearance
that over time there has been a burn/soot buildup to it.

IMPORTANT! Before inserting the hook that
holds the chain the kettle hangs on into the beam, attach the hanging
chain piece first! Believe me, the fit is tight and it's easier doing
it this way.
For the back wall, using KRYLON's Sandable
Primer as a base coat as well as a primer, I drybrush first with Black,
then dullcoat.

Then drybrush slightly with brown and add the detail to the outer cages.

For the back piece behind the cages, don't
go to too much trouble detailing the rats & bats. You can hardly see
through the bars, and the kettle pretty much covers them anyways.
I sprayed the piece White, and then used browns to paint the inhabitants
back there.
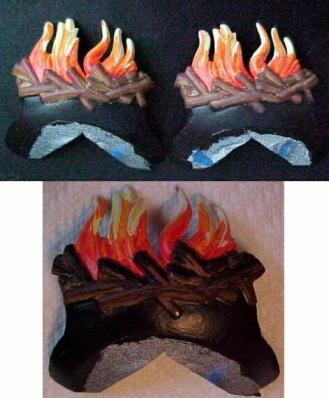
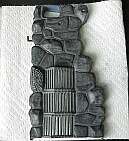
For the flames, I spray a coat of Flat
White on the two pieces, then paint the base of the flames with orange.
Use a dark Brown Umber for the logs.
 Then
go over the flames with Red and Yellow Prismacolor pencils, and the
logs with a light brown. Rub it smooth with my finger and hit it with
a coat of Krylon's Matte Finish. Then go back and blacken up the logs
some. Then
go over the flames with Red and Yellow Prismacolor pencils, and the
logs with a light brown. Rub it smooth with my finger and hit it with
a coat of Krylon's Matte Finish. Then go back and blacken up the logs
some.
 The
yellow didn't come out on the camera shot, but wanted to show the back
of the flame pieces. I painted them up as well, because when you put
the kettle in there, from some angles you can see back there. The
yellow didn't come out on the camera shot, but wanted to show the back
of the flame pieces. I painted them up as well, because when you put
the kettle in there, from some angles you can see back there.
For the Boiling Stew, first I mask off the
edges of the kettle, and base coat White. Once dry apply a coat of Leaf
Green. Then just have fun painting up all the stuff she's got floating
around in there!
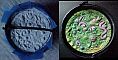
Once dry, I hit it with Krylon's Matte and when that's dry, put a nice
thick coat of Future Floor Polish to give it that wet look!
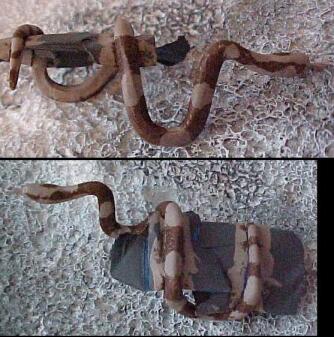
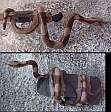 For
the snake, base coated him with a light Tan,
then drew in dark brown patterns using Prismacolor Pencils. For
the snake, base coated him with a light Tan,
then drew in dark brown patterns using Prismacolor Pencils.
We covered Bats during the DRACULA buildup, but when it comes to Rats,
don't forget that they come in a wide variety of colors. So don't just
limit yourself to browns...be creative!
For the Rat hanging off the beam I do a black & white scheme. The
two on the Witch herself I paint White and use a Prismacolor Black pencil
to lightly color them, rub it down with your finger, to blend it into
the White. Tails pink.
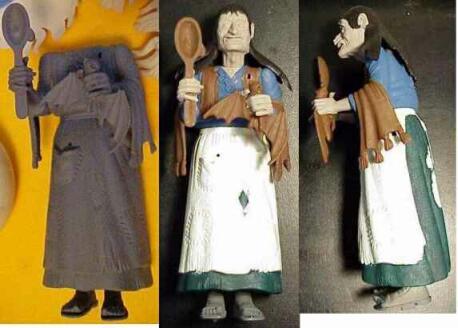
~ Painting the Witch ~
Starting with a primer coat, I paint her apron with an egg yellow
color, then Anita's Medium Blue for her shirt, Fathom Green skirt and
Apple Barrel Brown Oxide for her shawl.
Not liking the yellowish color on the apron, I go over it with white.
Then mix up Brown Oxide, White and just a touch of black and paint the
face and hands.
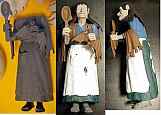
Now to touch up where I 'got outta the lines', paint her shoes and feet
and spray her with dullcoat!
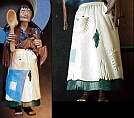
Then on to some drybrushing.
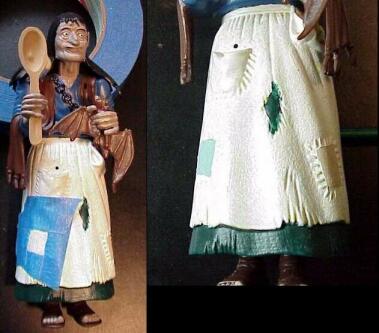
Using Masking Tape, I tape off the 2 patches on her apron, paint the
square White (to seal the tape down), then paint one a light Tan, the
other a light Blue.
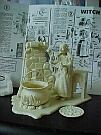
~ Jars & Bottles! ~
With the addition of CLEAR plastic, one just has to fill these Jars
and Bottles with something cool!
The wife mentions dish washing detergent, and going into the kitchen
I spy both a nice Green detergent, as well as a nice Blue!
I removed the big Jar off the sprues, and at first was going to lay
one half on it's side, fill it with detergent, glue the other side on,
and stand it up.
In the end what I did was:

- Glue the Jar together and let dry...
- Using Crimpers, crimped the stopper off the top of the Jar...
- Pushed a styringe through the thin plastic left on top of the Jar,
then removed it...
- Filled the styringe up with Green detergent...
- Cleaned the styringe out, then reinserted, pulling back on the plunger
to remove trapped air...
- Applied liquid glue to the small needle hole and glued the stopper
back on top.
The wife then suggested Cough Syrup for a nice Blood Red look, and
Palmolive Soaps that come in different colors!!
The small Jug I'm painting White with a Brown colored top vice filling
it up with liquid. For the 2 bottles, Calliban is sending me some nice
transparent paints to try out, so I'm holding off on those for now.
~ After Thoughts! ~
Had a lot of fun painting up!! I enjoy a kit with a lot of extra details
and this model, like the Bride of Frankenstein, meets the challenge!
I went alittle heavy handed on the stiches around the 2 patches on
her apron, but other than that, I'm pretty satisfied with the way she
turned out.
Wish the eyes weren't so bugged-out looking. Was tempted to try and
make them smaller by carving in eyelids, but was afraid I'd screw it
up, so left the face as is.
Was also going to paint a nice white streak of hair to give her that
Cruella DeMille look, but forgot all about it when I got to glueing
her to the base. Might add it on later.
Overall, a nice reissued kit from POLAR LIGHTS! My thanks for the
opportunity to build her once again!!
Happy Modeling! - Buc (May/June 00')
Work Bench
WITCH Photo's
|