This poor kit has been sitting on the shelf at my local hobby shop going on two years now!! Priced at
$49.99 wasn't too bad, but usually the reason why I was in the shop in the first place was because other kits
had just come out and I was looking to grab them up!
Yesterday when I went to pick up more Dullcoat and other supplies I noticed the price had been lowered to only
$39.99.
The next day was my birthday, and Roe had already given me some great presents, when suddenly she asked,
"I'm going down to the shopping center, need any thing at Lee's Hobbies?" So jokingly I said, 'Yeah, there's this
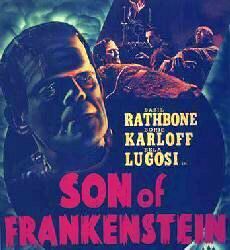
great 'Son of Frankenstein' vinyl kit marked down to only $40! Nab it for me!!"
Sheesh! Through the door she comes, in from the snow, and I'll be damned if Franky Jr isn't in her hand!! Man, what
a well trained modeling wife she is!!!

Preliminary Steps
This will be my very first vinyl kit! I find it appropriate that it's Franky, since my very first styrene kit, all those years
ago, was in fact AURORA's Frankenstein!
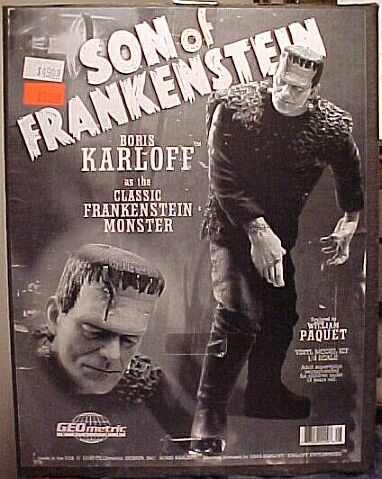
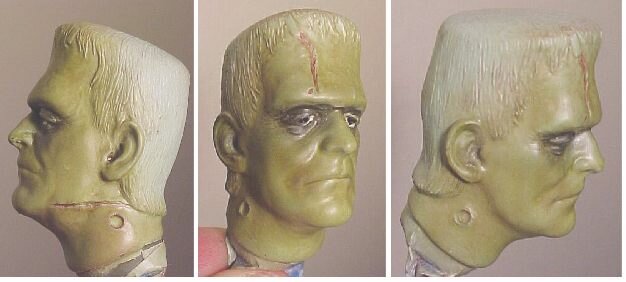
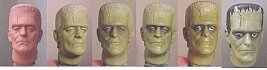
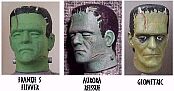
First thing I do is vist Gremlins and do a search on GEOmetric.
Find three paint jobs done on this kit, which shows what it looks like when completed.
 Next step,
borrowing the wife's hair dryer, commence to heat the various parts and cut off the stubs using my exacto knife. Everything cuts clean and easy and the test fit is fantastic!! If all vinyl kits are like this, I think I'm in love!! Next step,
borrowing the wife's hair dryer, commence to heat the various parts and cut off the stubs using my exacto knife. Everything cuts clean and easy and the test fit is fantastic!! If all vinyl kits are like this, I think I'm in love!!
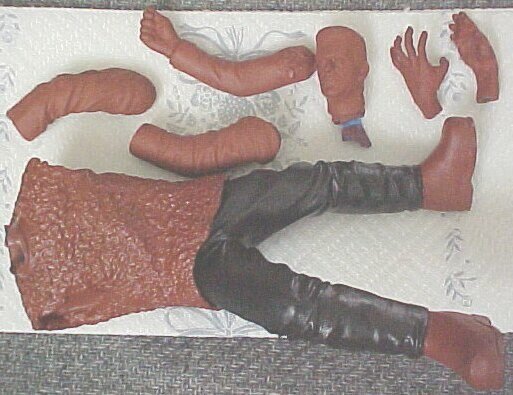
Wash all the pieces in warm, soapy water and let dry.
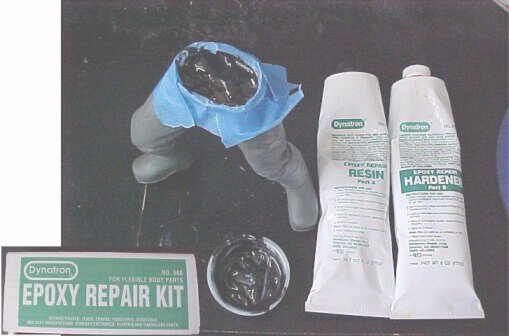
 Cut two plastic
garbage bags into 3" wide strips and stuffed them down the legs. Then mixed up a batch of 2-part epoxy and filled
in the top opening. Cut two plastic
garbage bags into 3" wide strips and stuffed them down the legs. Then mixed up a batch of 2-part epoxy and filled
in the top opening.
Lay a nice bead of Testor's Contour putty around the gap between the top of his boots/bottom of the pants,
and wipe the excess off with a Kleenex.
To make sure the torso is securely attached to his legs, applied a bead of Zap-A-Gap CA to the top of his pants.
When that was dry, turned him over and layed a heavy layer of glue inside the torso/pants area.
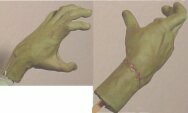
Glued the thumbs and fingers on the hands, & puttied the gaps.
 For ease of painting, I'll keep the parts in sections...arms, hands, head seperate, torso/legs together. Paint them each up, then put them together. For ease of painting, I'll keep the parts in sections...arms, hands, head seperate, torso/legs together. Paint them each up, then put them together.
Painting Stage
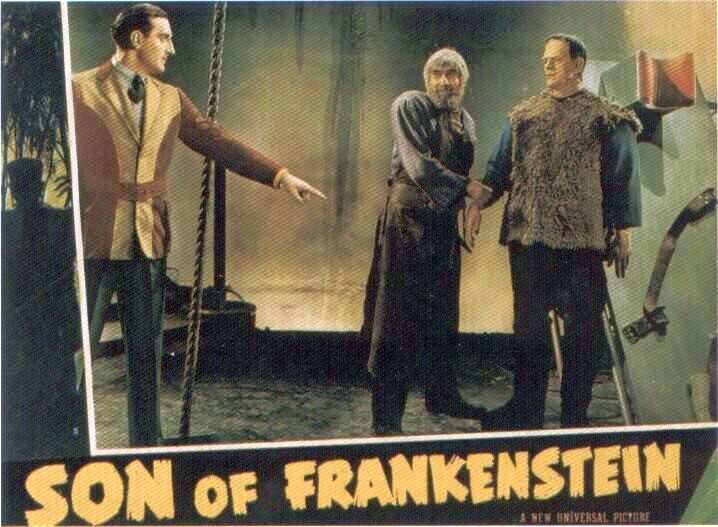
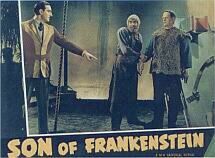 Found this lobby card on the Movie
Poster newsgroup. Found this lobby card on the Movie
Poster newsgroup. Not sure if these are taken in B&W and later colorized, but was surprised to see blue sleeves on the Monster!
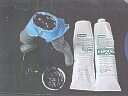
Materials
For this kit I'm using:
- KRYLON's Ruddy Brown Sandable Primer
- KRYLON's Matte Finish
- TESTOR's Dullcoat
- AlphaColor Soft Pastels
- Anita's, Apple Barrel, Delta Ceramcoat, Palmer Prism acrylic 2 oz. bottles
- Prismacolor Soft Lead Art Pencils
- Sanford Uni-Ball Gel Pens & Staedtler Pigment Liner .005 Pens
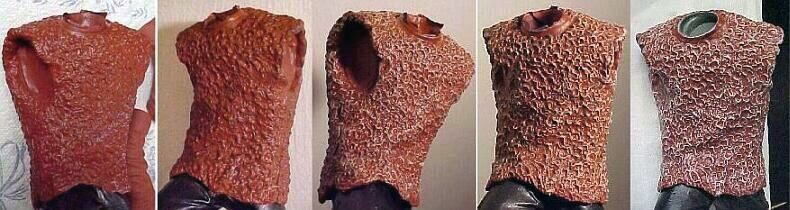
The Torso/Legs
Paint the pants using Palmer Prism Raven Black and then hit it with a coat of Krylon's Matte Finish.
Taped off the arm and neck sockets on the torso, and sprayed an even coat using Krylon's Ruddy Brown Sandable Primer.
Drybrush over the Rusty Brown primer using Anita's Espresso Bean Brown, then seal. Next dry-brush on Ceramcoat Chocolate
Brown, seal again. Finish off by brushing on a White pastel to smooth it all together! Sad thing is, once you seal it, that nice overall
white chalky effect washes out...damn! Ended up dry-brushing White lightly across the entire torso.
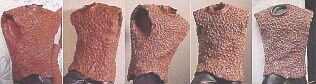
Last thing I do is dry-brush Anita's Expresso Bean Brown on his shoes and then hit the whole thing with a nice coat of
Testor's Dullcoat!
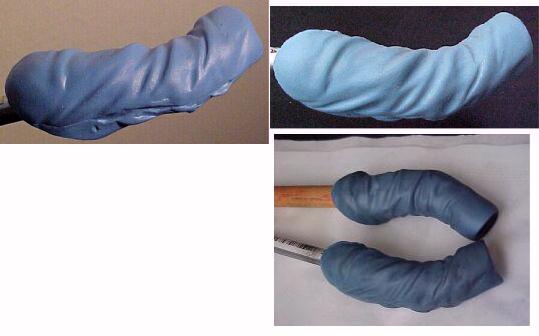
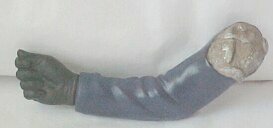
The Arms
For the arms, started off with equal parts Anita's Medium Blue & Ice Blue mixed together...then seal.
Was alittle too dark, so lightened it up some, sealed, then brushed over with a Dark Gray pastel, seal again.
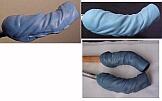
Remember your color steps here, and don't forget you have to duplicate this for the collar section underneath the
fur vest!
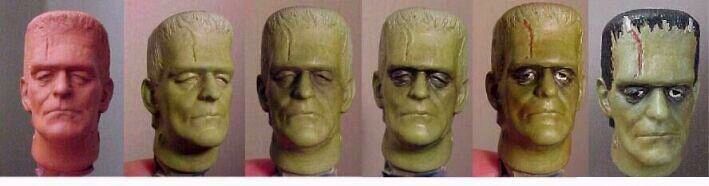
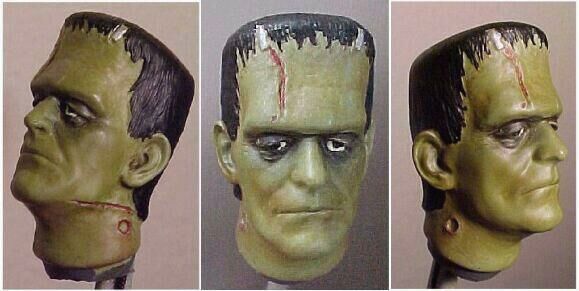
Head/Hands
Spray the head and hands with Pea Green satin, seal. Then using pastels brush on green and yellow, then seal again.
Dark Gray pastels around the eyes, seal. I wanted the area around the eyes more pronounced, so used a .7mm technical pencil, & darkened it up some.
Then brushed over the whole face with a Brown Sienna pastel to blend it all in. Using a Yellow Gel pen, color in the eyes, a Black Gel pen
to dot the iris' and a Prismacolor Red pencil to line in the scars and stiches.

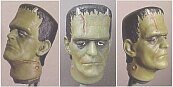
Same colors used for the Hands.
Painted the Inspector's arm a Navy Blue, & glove Black. For the stump, base coat in White, with light Brown pastels rubbed on, and
Silver tech pen for the staples.
Then simply glue all the parts on, insert the neck bolts and done!
Summary
Well, I gotta admit it...vinyl far outshines both styrene and resin, if this kit is any indication!!
Except for the deviations from those two mediums, that of cutting off the stubs and filling the kit for strength, the lack of any
sanding, the very little putty work and the excellent part fit, vinyl looks to be far superior to everything else!!
Either that or this kit is just the 'perfect' vinyl kit!! (Gawd, I hope not!!)
Like Polar Lights' T-Rex kit, I was very happy with the paint job overall. Everything I did seemed to come out exactly
like I wanted it too!! Man, that don't happen very often!
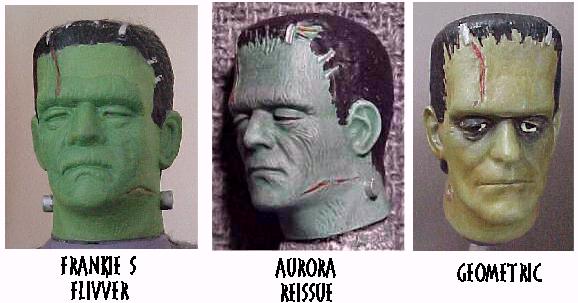
This is my 3rd Frankie kit since I got back into modeling again! My first was Polar Lights Frankie's Flivver,
the 2nd was PL's reissued Aurora Frankenstein, and now this one. Still have a way to go, but even I was
surprised at the differences!
So a big tip of the hat to George Stephenson and GEOmetric for a very FINE kit!! (Now I feel bad I let poor Franky sit so long on the Hobby Shop's shelf!!)
Happy Modeling - Buc [Jan 01']

|