|
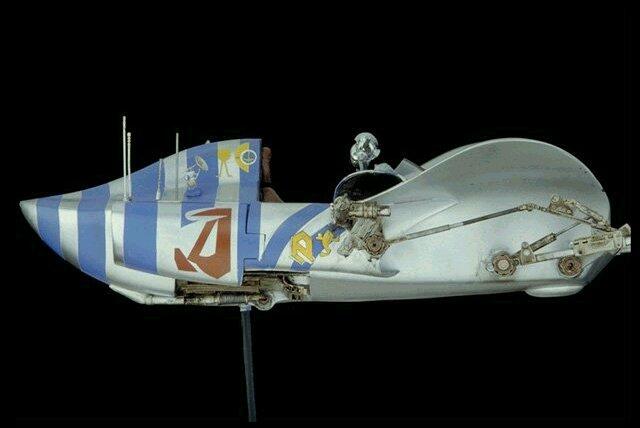
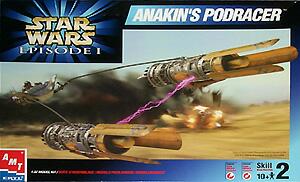 AMT/Ertl's new ANAKIN'S POD RACER model. So far it's the only model that caught my interest from the newest Star Wars movie.
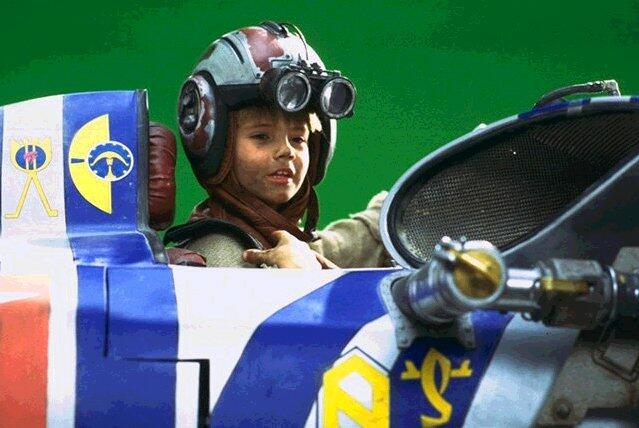
Spent days looking for good reference photo's
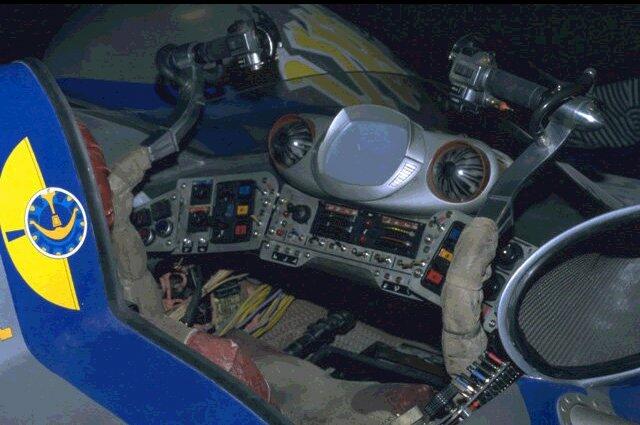
of Anakin's clothes, and close ups of the instrument panels. Thanks
to Jason & Alex for most of the better ones!
Things to watch out for:
I assembled the driver's section, but did not glue the figure to the seat, or glue the seat into the cockpit, in order to paint them first. Work on the driver's section stops once the cockpit panels are inserted, (Step 11 of the instructions), but go ahead and glue #54L/R on as well (more on this later in the decals section). The two handle bars are to be inserted WITHOUT glue and can be slightly tricky when you are trying to insert the cockpit down into the body of the driver's section. But it can be done and is a smart move on AMT's part, since gluing them in solid before you insert the pilot could become a problem when you try to align the hands onto the handle bars. Once painted, you're ready for...
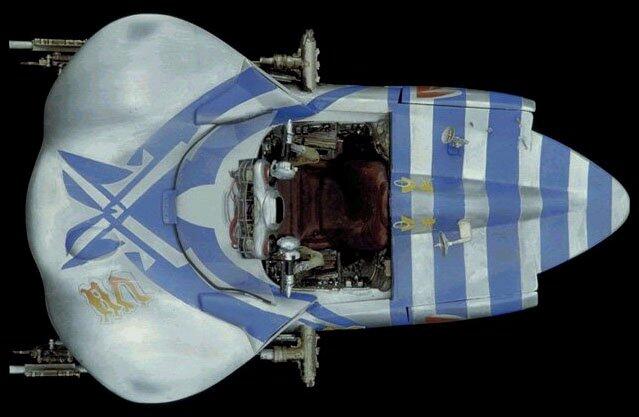
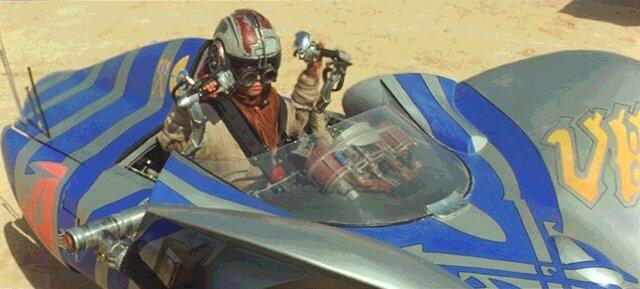
A few 'heads-up' are called for: Before you apply the decals to the FRONT HOOD area, glue parts 54R and 54L first!!! (If you go by the instructions and apply decals after step #11, decals 14, 16 and 17 will be UNDERNEATH the small vent-hood pieces.) (See PHOTO next paragraph). While studying the photo's I had tracked down for reference, I noticed that the hood decals are not correct! The 'V' should go alongside the outline of the windshield, where it meets the hood, (SEE PHOTO) and should not go underneath the windshield itself. But when I looked at other photo's, those not showing close-ups of Anakin, the decals go underneath the windshield? I'm quessing that the actual model for the actor to sit in wasn't checked closely against the CGI version. So in the end, don't worry about it and have the decal going under the windshield as the instructions state. BEFORE!!! you apply Decal #13 (the large 'X' looking one) onto the center of the hood, memorize the slot that the windshield goes in. In fact, test fit the windshield at this point, making sure Parts #54L/R are already glued in place. You'll notice that #54L/R have small slits alongside, where the windshield edge rests there. I scored these deeper with an exacto knife a couple of times so that the plastic windshield edges had something to grip to. Trust me on this...because once Decal #13 is on, it covers that slot and when I got to the windshield, I tried to find the slot by using an Exacto knife, but stopped before I ruined the decal. I ended up cutting off the tab on the windshield, which made glueing the windshield down a holy bear!! Elmer's Wood Glue wouldn't work on glueing down the windshield, since it needs a rather long time to set up, and I needed something that would quickly set because the two edges had a tendency to want to snap out of the small grooves on the hoods. I ended up using CA (superglue), which worked well. (Just be dang careful that you keep your fingers FAR AWAY from the glue or you'll either become VERY attached to the windshield or get fingerprints on it!!)
Step 13 of the instructions, where you glue on the side arms that will later be holding the long poles to the pods themselves, are at first slightly confusing. The order of how you glue what parts on first is pretty critical. I
found this order best:
Do the same on the other side. I gently moved (#58) downward, so the 'L' shape is pointing at the gear knob of (#60). Then just check your alignment between the arms and make sure they are even by looking down the nose of the Pod Racer. Also test fit the long poles and see if they lay snug in Parts #64R/L. Mine didn't. The poles were thicker. I used the end of a paint brush and a heat gun to warm up the plastic and open it up slightly more.
The Pods come in four pieces...(two would have been alot easier)...and the instructions will show you one pod, with the numbers from the second pod in parentheses. When putting the four pod sections together, MAKE SURE that the details on the pods LINE UP! A good way to check, is to look for the mounting holes for the THREE Fins that go on the front of each pod. Make sure the mounting holes are triangularly situated evenly around the pod.
(and stupid me...in my eagerness to get the Pod halves glued, I didn't notice that PART 3R/3L should be glued on, INSIDE the Pods before you glue them up!) So don't forget them, although I just glued the cover panel flush against the Pod body, which covered up THAT mistake quite nicely! The pods themselves have alot of nice detail work that has to be added to each of them, and I left off the three long forward panels, again for painting purposes. I decided to have the three front fins in the closed position, (like the box cover has them), but you can have them half open or fully open.
I had everything painted and all the decals on. The last step was to join the Racer to the two Pods. I placed the model on the stand provided, with the wire supports. Then inserted the Purple 'electricity' into the holes on the side of the Pods (unglued, since it fit in there pretty good), and then test fitted the two 'poles' from the Racer to the Pods. I glued BOTH poles to the Racer side, as well as onto the sidearm holders, (Parts #64R/L) first, so that both poles where dangling out unattached. In this way, you can gently nudge the two Pods around and line up the poles to where they will attach onto the Pods alot easier. Once you're satisfied with the line up, go ahead and glue the poles onto the Pods and it's done!!
Not having built a model in the last nine years, I probably should have started with something less complicated. But it was a great learning experience and allowed me to experiment with new glue, acrylic paints (which is a first for me...on models at least), and wash and drypainting techniques. KRYLON's gray sandable primer in the 12oz. spray is great and allows acrylics to really go on nicely. I discovered when using PALMER Prism Silver (in the 2oz. liquid bottle), doesn't react well with TESTOR's Dullcoat in the spray can!! I recently bought a bottle of TESTOR's Dullcoat Lacquer in a bottle, but haven't tried it out yet. Maybe it would have worked better? I was more impressed with the liquid bottle acrylics than I was with LIQUITEX tube paints, especially if you are using a brush vice an air brush! And especially for large areas. I should have bought a spray can of silver vice brush painting the Racer. I'm a big fan now of PLASTRUCT BONDENE glue. This liquid glue with the brush in the cap is FAR superior than the old glue tube!! Much more control and alot less glue needed to get a nice, firm set. Beautiful stuff, this!! The old modeling tools are still a god-sent. Fine grit sandpaper, the trusty old Exacto knife, and the wife's emory-boards are still a mainstay for any tool box! Was also my first time using putty. Only able to find SQUADRON GREEN, and although it did the job to cover up seams, want to try MAJIC SCULPT, MILLIPUT and AVES APOXIE SCULPT and see which one I like best. I'll probably buy another Pod Racer...redo the first Pod (right this time) and rebuild the Racer portion over again. I'll keep the second Pod and the seat/figure since they came out good. I primed the base, but did not paint it. For now I'm only using it to hold the model. I'm sure that someone will release Sebulba's Pod, (hopefully in the same scale) and I'll make a base to hold both of them! But it's a nicely detailed model and was a pleasure putting her together! Hope you find this page useful when you decide to start on this model, and let me hear how it came out! Another Pod Racer reviews can be found
here: Happy Modeling!! - Buc
|