
|
Using Cinemodels 'AURORA' logo, and Polar Lights distribution, the
awaited reissues started to appear throughout the land!
Since POLAR LIGHTS is planning on having a Contest surrounding these
four reissues, I decided to see if I could finish one before the Contest
Entry deadline (Oct 25th). The only problem was, which one to buildup?
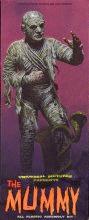
Of the four, only three had appeared in my TRU stores. Dracula was
still impatiently missing. So I had Frankie, Wolfie and Mummy to select
from.
Since I recently finished 'Frankie's Flivver', I decided to hold off
on doing another Frankenstein. And although Wolfman has to have the
all time lamest pose, it would probably provide the best painting variations
for contest purposes. But, I've got a warm spot for this old wrapped
dude, so decided to go with da Mum'ster!
So let's open that box and start...
Like the color it's molded in, but unfortunately my Acrylic paints just don't like sticking to virgin styrene!! So will probably prime this with KRYLON's Flat White, checking to make sure all my seams disappeared and then do some massive washes & drybrushing. Looking over the instructions, and planning out my painting stages, wasn't sure if I should glue the body, head and left arm on, keeping the right arm off for awhile. Also wasn't sure about the bandages hanging off him. Put them on initially or wait til after? Since I couldn't find any online reviews, decided to go to my ace in the hole and call upon the great S.M. Clark! Clark told me to build the entire Mummy, bandages and all, and the entire base and then go ahead and start painting. So that's what I'm doing so far. The Mummy himself is a piece of cake! In fact, those bandages make it easy to sand away any seams showing. Using my trusty set of needle files, I used the flat pointed file to go at the overall seams, and then a nice thin rounded file to redo the bandages! Probably the easiest sanding job I've come across so far of all the recently built models!! The stone tablets where harder to hide seams. Used TESTOR's Contour Putty for the ones that wouldn't sand away.
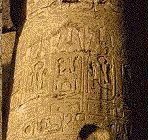
Primed the base with KRYLON's Flat White. Using the trusty Internet, looked at different Egyptian columns and inscriptions. Liked this color scheme
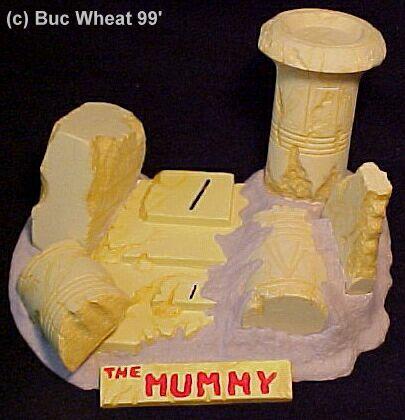
Then started out with a Flat White with a touch of Brown Oxide and painted all the sand. For the columns/tablets, mixed up a batch of White/Yellow/Brown Oxide for a sort of dark egg-white to match the photo above. Now the sand looks pink?!! Ever do a model and you have NO idea how you want to paint the dang thing? This is a first! Everything here can be so... so... WHITE that you want desperately to do SOMETHING different, but yet have no idea what!?!! Well, I'll keep experimenting and see what happens! (And I haven't even gotten to Kharis yet!!!) So, we have pink sand, egg white columns, and the stairs still white. 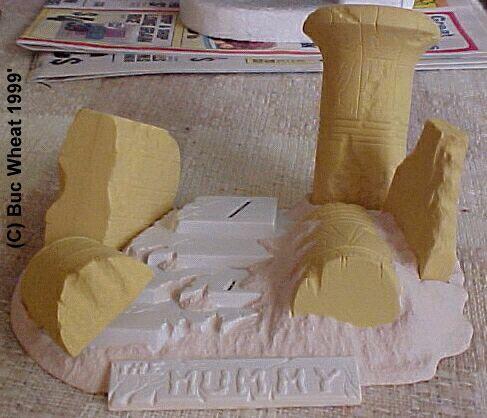
On hindsight, do the sand on the base LAST! Do all your weathering on the stairs, tablets & columns, then go and paint the sand! Did the stairs and name plate in the same color as the columns. Poured some Burnt Sienna, and with a fine point brush dipped in water, thinned the paint down and outlined all the heirogryphics on the columns/tablets, as well as a heavier wash on the portions that were chipped. Once dry, painted the sand Sunshine Yellow... which was a LITTLE to bright for my taste! So as I was going over the different paints on my Paint Shelf, noticed a bottle of Anita's Sand/Sable acrylic!! Tried it on the back of the base and let dry. Looked like light gray, so added some Brown Oxide to it and looked alot better. Using PALMER Prism's Holly Red, did up the letters. Then sprayed a layer of Dullcoat on it.
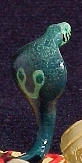
Later I took out ANITA's Sand acyrlic again, and drybrushed it over the sand, which made it look alot better. Research on cobras, looking not so much for color scheme, since I wanted to do him in a greenish combination, but more for how colors merge and appear overall! Also wanted to know exactly how the 'V' on the back of his hood appeared.
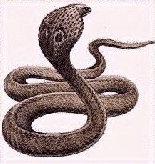
Using TESTOR's Gray Primer, gave him a nice primer coat and then resanded some portions that showed up from a coat of paint. Base coated him using ANITA's Fathom Green. Slightly difficult getting acrylic paint to stick to the cobra, even after a primer coat? But once this initial green dried, subsequent coats went on well. Once dry, followed up with a Fathom Green/Sunshine Yellow mix, painted portions of his belly, inside the hood, and his head, drybrushed various green shades, mixed in w/ some browns & blacks. Detailed the 'V' on the back of the hood and some stripes on his belly.
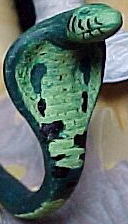  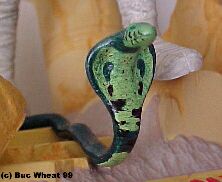
Put a coat of FUTURE Floor Finish to seal him.
Started with KRYLON's Flat White for a primer. Let dry, then checked to see where I missed. (The light tan color vs. the flat white was a bear in making sure I covered everywhere!) Checked for seams showing, and corrected them where needed. Mostly on the seam across the top of his head.
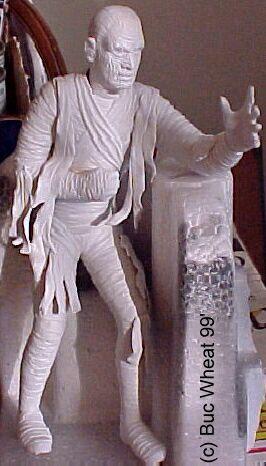
Grabbing up ANITA's Sand, I dry brushed all the bandages, giving it that dirty look. Followed that up with various shades of gray and black dry brushing. For the face, wanted that rotting skin look, so first wet brushed green to tint the white primer up some, then a red wash over that. Same with his hands. Glue the snake down, then Kharis himself. Done!
This is the first model I've ever done where I didn't have any preformed painting plans!! Was quite enjoyable, to say the least. Was extremely pleased with how the parts went together, and estatic with how little putty and sanding had to be done on this model! Kudo's to Revell for the fine casting job...you have my thanks for a chance to once again put ol' Kharis back together again after oh so many years! Happy Modeling! - Buc (Oct 99)
|
 It was with smiling faces that we heard
Toys R Us (TRU from now on) tasked Revell-Monogram with re-issuing our
favorite foursome; Frankenstein, Dracula, Wolfman & The Mummy.
It was with smiling faces that we heard
Toys R Us (TRU from now on) tasked Revell-Monogram with re-issuing our
favorite foursome; Frankenstein, Dracula, Wolfman & The Mummy.