|
Yeah, pretty stupid... especially if you were around in the earlier 60's
and already had the original Aurora versions proudly displayed on your
shelves!
But if you were like many of us, by 1992 those older originals had gone
the way of the DoDo bird! And unless you have a lot of money not doing
anything in your pocket, the LUMINATORS are a great alternative to getting
your hands on these long gone models!
eBay is a GREAT source to find all the series. Although with the recent
arrival of the Toys R Us exclusives (Frankenstein, Mummy, Wolfman &
Dracula) you can forego Luminators and get those much cheaper.
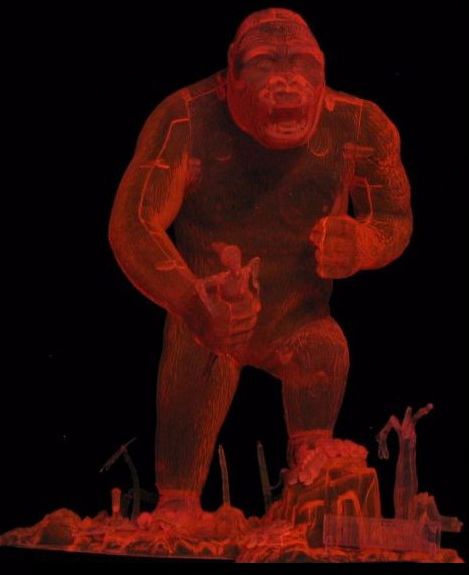
Kong still hasn't come out again in a nice styrene since his initial
appearance way back when, except for the LUMINATORS series, and although
he doesn't come up AS often as the others, he still comes up frequently.
I'd suggest if you want this version and go to eBay, I wouldn't pay more
than $40 tops for it. I got mine for $31.00 after trying for a couple of
months.
The only problem that was tricky was putting Kong's two legs onto his body. Not only does the transparent pink plastic make it hard to see what you're doing, the legs don't have a nice tight fit. In fact, there are rather large gaps on his left leg, around the front portion, and some gaps on his right leg. Since this plastic is much lighter and flimsier than normal styrene, you have to ensure when you glue parts together, that they set strongly! Too much pressure brought to bare on the plastic as you try to sand down uneven seams, or sanding down putty areas, can result in damage if you're not careful! At the initial glue stage, don't worry too much about the seams or the gaps! Put his body together, including Fay in his hand, and then give it a nice even coat of primer. I used KRYLON's Sandable Primer, which is a nice dark gray. This will allow you to see all the seams and gaps that need attention. (And believe me, there's plenty!!) Sanding and putty work... Get ready for a few days spent just on this phase! After spraying a primer coat over three putty/sanding attempts, there were still seams showing! Finally semi-satisfied on the 4th go around. Using my awl and the back side of an exacto knife, scribed hair lines back in where sanding took them off. On the base you'll discover that you only got one of Part #23 (the palm tree leaves) vice the three called for in the instructions! What I ended up doing was putting the part you did get on a palm tree and placed that on the rear of the base in the back. For the 2nd palm tree, I took the small leaf that's suppose to be placed on the base. Put this tree in the middle of the base, near the mountain. I figured Kong will be straddling this one so won't be THAT noticable. The third palm tree, I just clipped off the top tip, heated it and then bent it over. I put this one in front, near the middle of the base.
For his fur color, found a couple of nice photos, like this one:
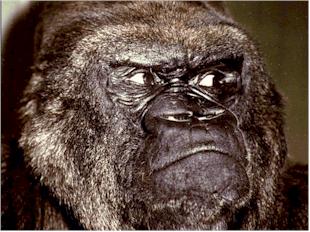 Sprayed Kong a nice coat of KRYLON Flat Black, and then mixed up an off gray and drybrushed around his face and body. Although the hair on his cheeks don't go up as far as this photo, I did paint gray in a 'whiskers' type motion on both sides of his face where the hair did start. Let dry, dullcoated, then highlighted with a light brown around his face. Mixed up White & Berry Red for a medium pink and did inside his mouth & tongue. Used White for his teeth and eyes, then flat Black once again to clean up any over spill. Once dry, dullcoated, then with magic markers, used a yellow and went over his teeth, followed by a light brown... (had Clark's photo up on the screen to help me along a bit). For the eyes themselves; I've always hated that teeny pupil only look that the Movie KONG is always shown with in the clips! Just makes him so unreal! So I took my fine point Black tech pen, and first put in the pupils... then I made a circle around the pupil, leaving the white showing through around the pupil. Once dry, I took a light brown magic marker and colored inside the circle. Once that was dry, used my trusty awl, dipped the point in white paint and applied a dot on each upper right of the iris, for that reflective look! Man, it came out great looking!!
While Kong's face was drying, mixed up Brown Oxide & White for a nice flesh color, and painted Fay's legs, arms and face. Dullcoated and letting dry. Decided to have a light blue dress, and painted the shoes in the same color. (She is wearing shoes still, isn't she?!?!!) Hair I painted yellow, then went back and highlighted with browns to cut down on the brightness. No matter how good you make Kong look, Fay's appearance just drags this model down some! That Pointed Hair-Do, what's with that?!? And the face details are one bear to paint up right and look any where near decent!! For the mouth, I first took my Black Techpen, and just placed the tip in her mouth and spun the pen around. Then using a red magic marker, lightly highlighted the outside of her lips. I had to go back with flesh tone and wipe out her face at least five times!! At one point you'd have thought she was hit with a whiff of Joker's Laughing Gas!! But finally got it half way decent. Tried a small dot of white for the eyes, but never got the left lined up with the right, so she looked like that guy off 'GOONIES'! Re-'fleshed' her eyes, and finally just took a simple pencil and marked a little line on each side of her nose. Believe me, with all the paint underneath her eyes by this point, it scratched through a layer or two and looked better than anything I had tried beforehand?!! So I left it alone.
On the rocks I left the dark gray primer color alone and using a light brown, dry brushed the edges. Then some Black thinned down to a wash and painted on, heavy in the crevices. Two trees up front Burnt Umber, then dry brushed a light gray and washed over with black. The palm trees, a tan, with a Green/Brown mixed wash bringing out the ridges. The boa constrictors: painted the one on the rock, green...and the one in the tree, brown. Base is done! Paint the Name Plate a dark green, with bamboo yellow for the letters.
Took my Xacto knife and cut the two slots for Kongs feet open more. In fact widened it slightly bigger so his feet just plop right in there! Sanded the paint off the bottom of his feet, for the glue to adhere nicely, and glued him onto the base. Just have to finish up the name plate and my favorite Aurora Monster of all time is once again on my personal Modeling Shelf!!!
Since this Luminators version is slightly expensive to find nowadays, I stopped myself from making any alterations and just built it right out of the box. But if someone does re-issue KONG in the future, I want to definately alter Fay some. For example:
Well, that's it for this baby! On to the next project!! Kong photo's here!
|