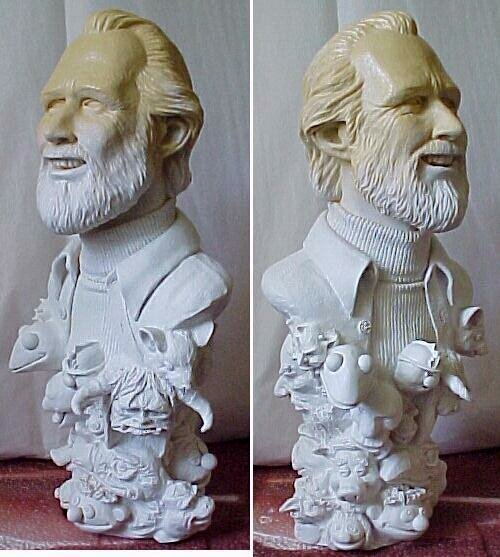
I did an Out-of-Box review of this G-Force Models kit, produced by Gary White, and now it's time to prep and paint him up for Model Maniacs magazine.

 The bust
is a hefty 10" high and comes with a wooden, unstained base to place it on.
The bust
is a hefty 10" high and comes with a wooden, unstained base to place it on.
So let's get started, shall we?
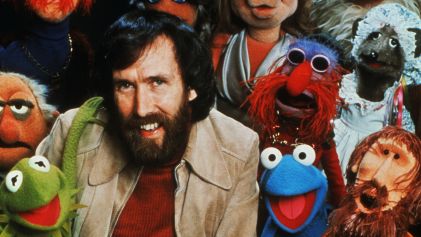
Jump onto the Internet and started hunting down photo's of Jim himself.
The difficult part for me was that it's been much too long since I last watched Sesame Street or the Muppets. So trying to remember what character came from which show, and especially which of these characters came from what motion picture, took me awhile to hunt down.
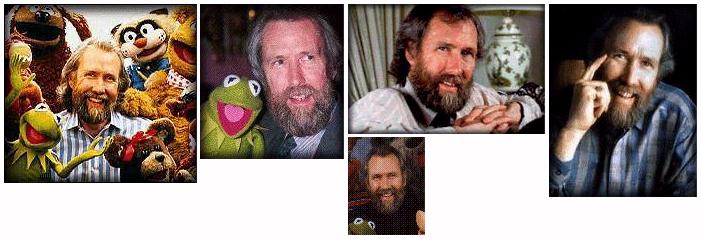
In fact, brought the bust to work and asked my team to help me identify some of the characters I'd never seen before. Ashamed to say that everyone spent the majority of that work day on the 'Net searching different Henson sites all looking for matches!! We were able to track down most of them and I made a composite photo of those we found...

The old man from one of The Storyteller episodes, I never could track down, and for those who I didn't know, who better to ask but the sculptor, Anthony Veilleux!!
 I just circled the faces I didn't know and asked him for color suggestions! He wrote back right away.
Plus I owned a huge, coffee-table book entitled, "Of Muppets & Men" - The Making of the Muppets"! So I was
set for bear!!
The casting is almost flawless! A seam line along the top of his shoulders & over his head that is easily removed, and one
of the horns on one of the characters, had flash resin that I removed easily with an exacto knife, and that was it!!
 To get rid of any Mold Residue, I tried a new trick this time! Usually, I fill the sink with warm, soapy water and scrub with a toothbrush.
I was talking with Suzi-Q and this time I decided to spray on Simple Green, scrubbed it down with a toothbrush and rinsed it off under running water, as per her suggestion!
To get rid of any Mold Residue, I tried a new trick this time! Usually, I fill the sink with warm, soapy water and scrub with a toothbrush.
I was talking with Suzi-Q and this time I decided to spray on Simple Green, scrubbed it down with a toothbrush and rinsed it off under running water, as per her suggestion!
Let air-dry over night and in the morning looked great!! Primed him with my trusty KRYLON's White Primer!
NOTE!!! You are going to be handling this bust A LOT!! So go out and buy up a large supply of plastic, disposable gloves so you don't leave dirt marks over time! [That's a lesson learned tip!!]
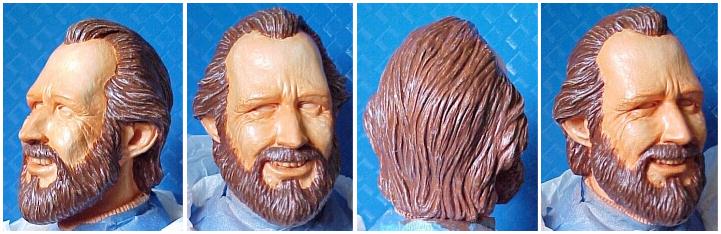
1. Head & Hair!
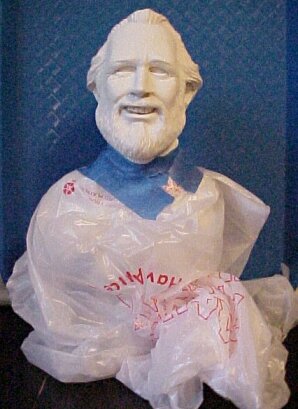 Since I'm mainly using Pastels on the face and hair, I was afraid excess powder would fall onto the lower portion of
the kit. So I took a plastic bag, opened a small slit on the bottom, pulled it over his head and taped it around the top of his
turtleneck.
Since I'm mainly using Pastels on the face and hair, I was afraid excess powder would fall onto the lower portion of
the kit. So I took a plastic bag, opened a small slit on the bottom, pulled it over his head and taped it around the top of his
turtleneck.
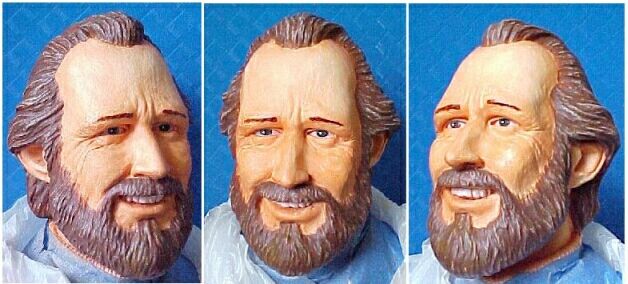
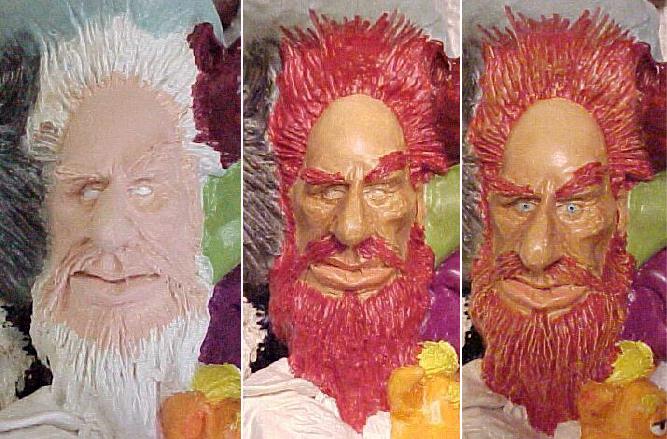
 Using this photo as a good guide for color shading the beard
and hair. Note that all initial pastels are applied directly to the primer coat. I don't seal the kit... believe the pastels have more to
grip and you're actually coloring the white itself and not a clear layer inbetween!
Using this photo as a good guide for color shading the beard
and hair. Note that all initial pastels are applied directly to the primer coat. I don't seal the kit... believe the pastels have more to
grip and you're actually coloring the white itself and not a clear layer inbetween!
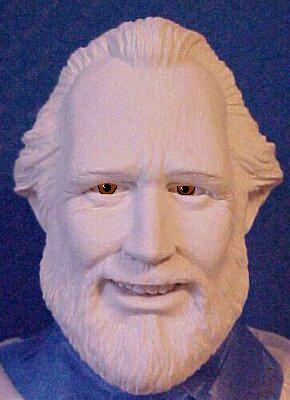
Using 'Eyeshadow Applicators' (the little spongy things that come in matchbook looking packs...in fact they look like pregnant matches!), I first apply
a light flesh color pastel to the face, then go over that with a light brown [2]. Looked a little jaundiced to me, and also the nose ridge was a little too
bumpy. So went back with some sandpaper and sanded it down some, along with some of the forehead area. Resprayed with KRYLON's White Primer and started again.
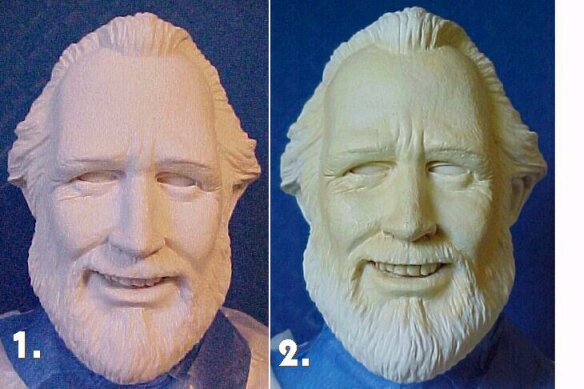
Okay, this time I start with a light, medium Ochre Brownish pastel [1], then a Flesh pastel and lighten up those areas on the forehead, & cheek bones [2]. Also go around the outside of the ears and on either side of the neck I have a light line where the muscle would be.
Still needs some blending, but starting to come along nicely! Looks like Robert E. Lee, don't he??! :)
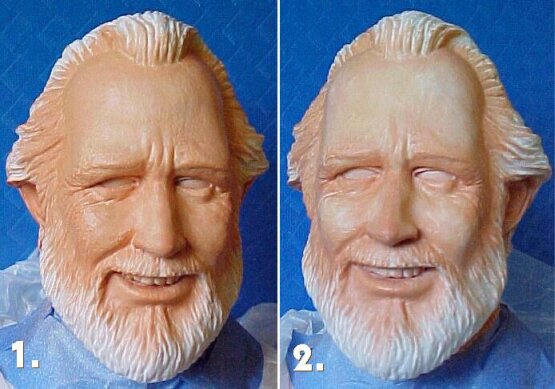

Next I take some White pastel and go over more sections of the forehead/cheeks, going back with the original Ochre Brown when needed. It's a balancing act that you really can't describe. When it looks right, you stop... if it don't, keep going! :)
Once I start on the hair and get that all worked in, it should bring the face out more and you can better judge if more work is needed on the skin tones. For now, I spray a layer of KRYLON's Matte Finish on the face and neck to make sure it doesn't darken it up any (it doesn't), so let's move on to hair and beard!
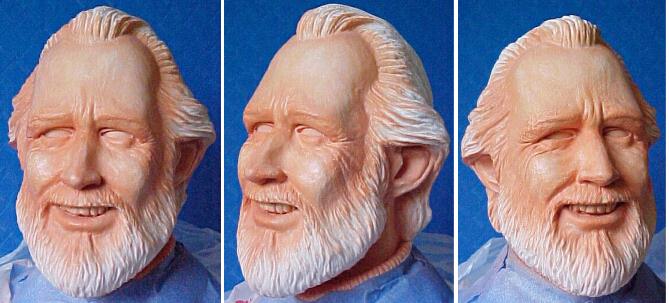
Start off with Apple Barrel Brown Oxide and seal with Matte Finish.

Drybrush in Anita's Steamed Milk for highlights!
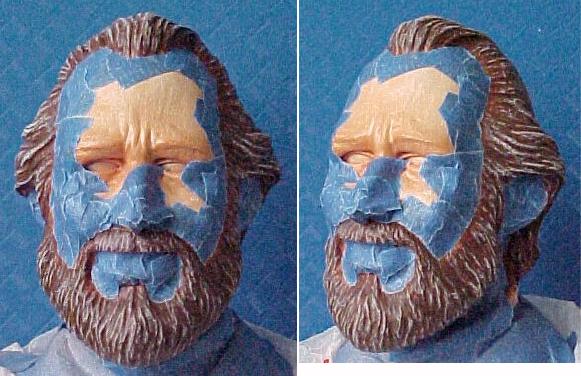
I mask off the face areas just for protection!
Once that dries, you need to blend in the two colors. So prior to sealing, I go back with a Dark Brown pastel and weather the two colors together, so they're not so stark. Again, going by the actual photo above, try to copy the same color scheme with the different shades of brown in Jim's hair.
...and unfortunately, the sealer washes them nicely away! But at least the colors are more subdued.
The multiple Matte Finish coats was making it too shiny to see clearly, so I hit the face and hair with Testor's Dullcoat.
 For the eye placement, since they usually give me a whole heap of problems, I pulled up the photo in Paint Shop Pro and
drew them in. This gave me some idea how big and where exactly they should be placed. [Ain't computers grand?!... I wish painting them
onto your kit was this easy!]
For the eye placement, since they usually give me a whole heap of problems, I pulled up the photo in Paint Shop Pro and
drew them in. This gave me some idea how big and where exactly they should be placed. [Ain't computers grand?!... I wish painting them
onto your kit was this easy!]
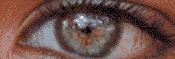 Well, we can't avoid it, so taking a very deep breath let's paint
those suckers in!! Found this eye to use as a guide.
Well, we can't avoid it, so taking a very deep breath let's paint
those suckers in!! Found this eye to use as a guide.
Using Anita's Barely Blue, paint the eye socket [1]. Once dry hit it with Dullcoat. A wash made up of Palmer Prism
Holly Berry Red, to touch up the corners.
Used a mechanical lead pencil to pencil in the iris', then a Staedtler #.005 Pigment Liner Black tech pen over that and a dot for the pupils. Then used a light Blue finepoint magic marker to color the eyes in. For the eye brows, a trusty Design2 Walnut Brown art marker.
To finish it all off, tip a sewing needle into White paint, and place a reflection dot on both eyes. [2]
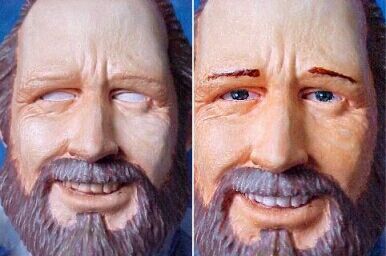
Probably won't win any 'Eye' awards, but as we say in the shop, "...good enuff for Government work!!"
 Alrighty then! Step 1 is
finished, on to Step 2!
Alrighty then! Step 1 is
finished, on to Step 2!
The box photo showed a Dark Red turtleneck, with a black shirt. Most of the photo's of Jim I ran across had him wearing
light colors. So I'm doing the turtleneck a Navy Blue, and the shirt a light powder Blue.
![]()
Using Anita's Navy Blue, apply two coats on the Turtleneck....
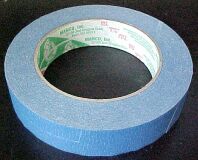 Now many of the characters are tightly packed, so to avoid getting paint from one onto another, I use MANCO, INC blue masking tape, wrapping it around the just finished character(s), after sealing them with Matte Finish.
All the characters I plan on doing with pastels I save for last. It's easier touching up the painted guys than it is touching up the pastel ones!


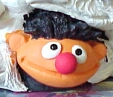


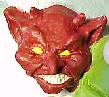


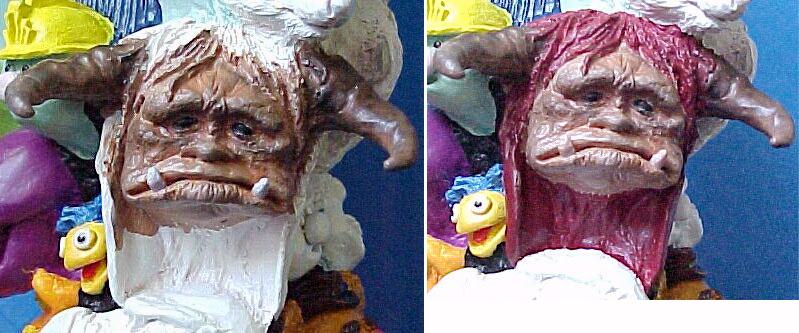
For the big guy, started with Delta Ceramcoat Light Chocolate, let dry, then applied Dark Brown & Black pastels to the horns and face. Sealed, then a Maroon Red made up of Holly Berry Red, with a touch of Violet & Black for the hair.
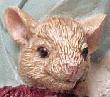
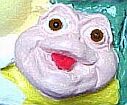
Tried pastels on the Skeeksis, but too much Matte Finish sealing the surrounding characters prevented them from going on as I liked. Did do the nose portion with light Brown pastels, but for the head used Anita's Lavender.
Once dry, then used a variety of pastels to bring it out.

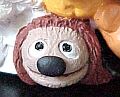
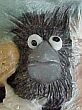
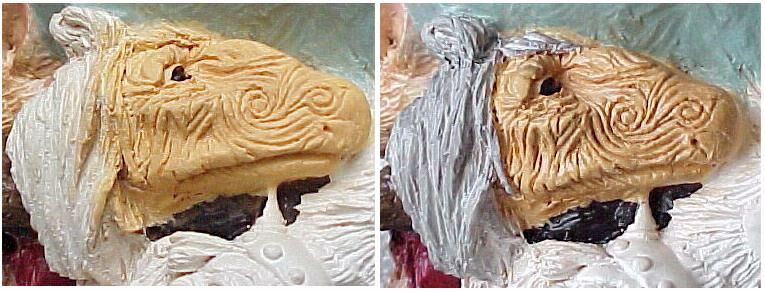
On to the Mystic, starting off with Anita's Ivory, with Light Brown pastel rubbed on. Repaint the hair portion with a fresh coat of White, and then follow that up with different shade Grays.
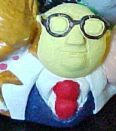
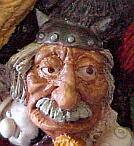
For the old man, start off with Anita's Blush, then various shades of Brown pastels, light Red for the lips. For the hair start with Anita's Spice Red, drybrush on Yellow. For the eyes I used a Design 2 Medium Aqua Blue art marker with a fine point Black marker for the pupil.
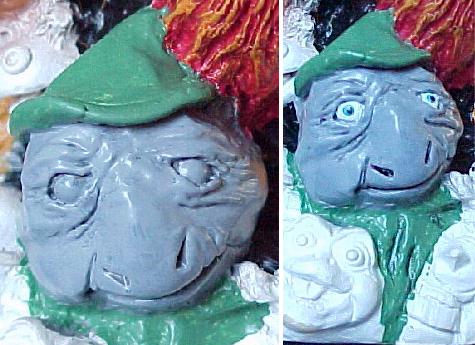
Turtle is Anita's Rainy Day Grey, Leaf Green and used a mechanical pencil to line the wrinkles. Blue eyes, again using a Design 2 Medium Aqua Blue art marker.
If I was starting over I think I'd cut a piece out of a plastic bag and cover his shirt and turtleneck area, taping it down. This would give me space to handle the bust while I was painting all the characters and keep this area clean. In the end I did go back and try to clean with alcohol, but ended up repainting the shirt again. I also went back and put more highlights to the hair and beard.
I'm not usually a big bust fan, but I loved the concept of combining the nice sized bust with the characters associated with the subject matter! It was a very unique and eye-catching combination and if one was thinking of doing a series of these, the skies the limit!!
Charles Shultz, Walt Disney (touchy if afraid of C&D's), Carl Barks, Chuck Jones, Dik Brown, Johnny Hart, Mel Blanc! Or even book authors like Isaac Asimov, Larry Niven, Terry Pratchett, R.A. Heinlein, ERB, Robert E. Howard,...comic artists like Joe Kubert, Bob Kane, Jack Kirby, Gil Kane ... even Underground artists like Vaughn Bode ...man, I could go on and on and ON!!! Just give us MORE, guys!!
The wide variety of characters demand a lot of different painting techniques to bring this kit to life and for that reason above all else, this is an excellent kit for improving your skills!
I'd like to thank Anthony and Gary for a bunch of fun-filled hours painting! And if you'd like to add this beautiful sculpt to your model collection...
Call: 519-853-3679 or email Gary or visit his
Web Site!
Price: $60.00 US or $80.00 Canadian
(Cheques or International Money Orders.)
G-FORCE
5-6 John St. N.
Acton, Ontario
Canada, L7J 2N5
Happy Modeling - Buc (June/July 01')