|
Have fond memories of building this model as a kid and wish it was out in
time for Polar Light's recent contest!
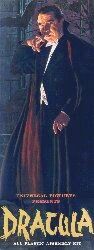
Although I'm still disappointed that the pose of the model isn't like the
pose on the box art, still look forward to adding this old friend to my
modeling shelf.
So let's open up the box and start...
Drac himself goes together easily. For the inner mouth, use a pair of needlenose pliers to hold the mouth piece, and test fit by looking at the front of the face. Move the mouth around until it looks good to you. Apply glue to the inside of the head piece and using the needlenose pliers, just press the inner mouth in, again looking at the front of the face to make sure it's where you want it. Put the arms on, but kept the hands off for now. Easier to get to his vest & shirt when I'm ready to paint.
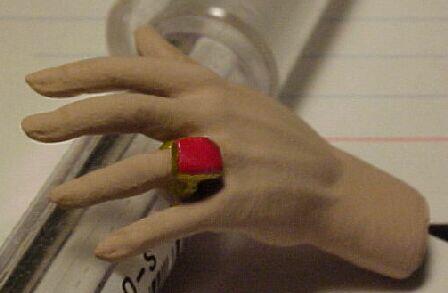
Took the left hand, and gently worked the ring onto the 3rd finger. Once all the way up, brushed liquid glue underneath the finger to set firmly. On the base, trimmed and sanded the edges. Then I removed the weeds, one by one, cleaned them up and glued them to the base. Be careful cleaning the spider's legs. I gently used an exacto knife to take the flash off. Then glued him on the rock. Put the tree & branches together, but left it seperate for now. Cleaned and sanded the two bats.
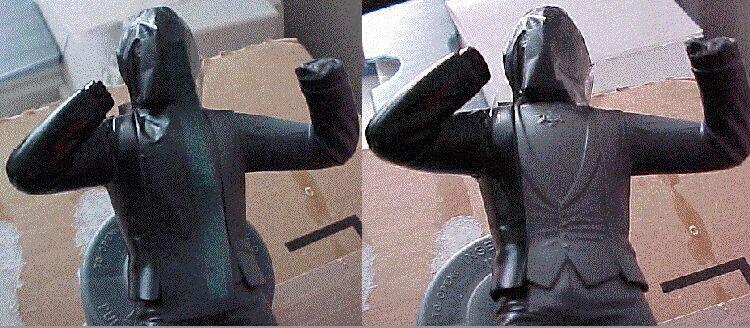
Prior to priming the Figure and the Cape, test fit the two and note where the plastic on each meet.
(Click on photo for larger image).
Primed Drac and the cape using KRYLON's Sandable Primer. Unfortunately, the original color of the plastic is just a shade off the gray primer color, so once dry, had to respray portions I missed earlier. Tried to use Post'em® notes to cover the shirt, vest and tie areas, but the glue on the paper wouldn't stay snug against the edge of the coat. So cut a piece of Post'em and laid a strip of Scotch Tape so that just a small edge of tape was exposed and taped it down the seam of the vest and jacket. Then I cut the corner off a sandwich bag, and bagged the head and tie, scotch taping the edges down his back. Using KRYLON Flat Black, sprayed the right side of him. Then removed the strip of tape and let dry.
  Once dry, cover the other side off, and do the left side. Postem notes, cut
in V's covered the end of the vest inorder to spray the front of the pants.
Once dry, cover the other side off, and do the left side. Postem notes, cut
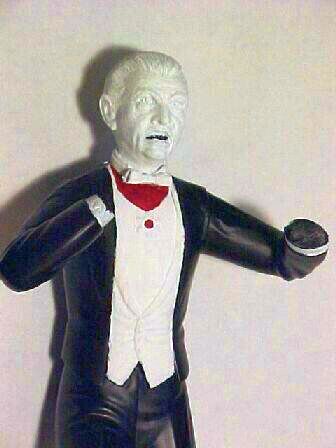
in V's covered the end of the vest inorder to spray the front of the pants.Left to dry all day, then masked off the jacket, top of pants and sprayed the vest, tie and head KRYLON Flat White. Nice layer of Dullcoat and let dry. Using the same dark red as the inside of the cape, I paint the ribbon and then place a red dot for the center of the medallion.
Hands, still unattached, I place on the end of Q-tips with my trusty Elmer's Tack (this stuff is great!!), and spray them both with KRYLON's Flat White and let dry.
Don't do anything to the teeth...were just too tiny to try and paint, so left them white.
Sprayed the outside of the cape pieces Flat Black, and then tried Sears Best Cherry Red interior/exterior enamel spray on the inside of the cape. (KRYLON didn't have a nice bright red on the shelf, so had to improvise!) Didn't work! Stuff went on too watery and would not bind with the primer. Lesson learned! Will see if it dries, & since most of the back cape is only seen down by his legs, will probably hand paint the red there & onto the two side pieces. I did like the dark maroon color, though, so mixed up a batch of PALMER Holly Berry Red and just a touch of Raven Black and hand painted over the inside of the cape, and those portions on the front of the cape. Liked the slight sheen on the black portions of the cape, so I didn't Dullcoat the cape at all.
Primed with KRYLON's Sandable Primer and let dry.
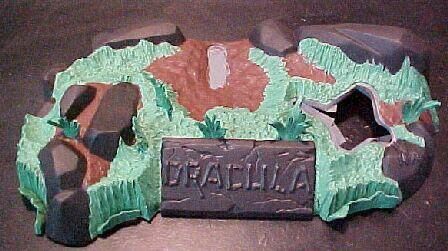
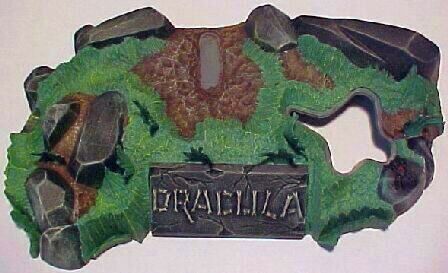
Dullcoat the base, then drybrush the dirt using Brown Oxide, some Golden Brown, then Sand.
For the rocks, and nameplate, drybrush with Anita's Sand to gray down the black rocks and highlight the
edges. Brings out the letters of Dracula nicely as well. Don't worry about the Spider too
much. Will go back and repaint him anyways. The Tree I leave KRYLON Gray. Use a wash of lighter gray, followed by a black wash and let dry. Different shades of brown dry-brushed in various areas. The more I looked at it, the more I didn't like it, so I sprayed the tree with a coat of KRYLON Flat Black, Dullcoated it, and went at it again, dry-brushing with Burnt Umber. Much better. Bats primed seperately. Dab of Red for the inside mouth, and a base coat of Brown Oxide.
Just think, when we were kids we just painted these suckers black, and that was that!!
Okay, all the painting is done. First thing I do is glue the tree to the base, and the bats to the tree. Remove the Scotch Tape from Dracula's back and on the cape and glue the back of the cape to the figure. Glue the two front portions of the cape on, then glue on the two hands. Had placed a narrow strip of Scotch tape to the base, where the feet go, so removed them and glued ol' Dracie onto his base!
The most impressive feature of this model is the care the sculpturer took on the hands! For their size, the amount of detail lovingly rendered on Dracula's hands are quite impressive! I've always had a great affection for the tree as well. Those haunted branches conjure up all those horror movies of old we loved so much! The face isn't the best Lugosi...but with a squint of the eyes one can almost see our beloved Bela reflected back. The stance Aurora gave our favorite Vampire made me and the neighborhood kids swear they were going to come out with an interlocking Dr. Van Helsing kit that would have him holding up a mighty cross and maybe a stake in his hands! Ol' Drac definately looks like he's shielding himself from some danger!! Alas, all our hoping was for naught...for ol' Aurora never did come out with a companion piece for this model. To all my sculpting buddies out there, make a Dr. Van Helsing for me and make our youthful wishing come true! Like the Mummy reissue, my thanks to the three companies that gave us another chance to build our favorite Vampire! This humble modeler appreciated the many hours spent putting him together once again! Happy Modeling! - Buc (Nov '99)
|
 This was the last of the four
Toys R Us (Revell/ Cine models/Polar Lights) reissues that came out this
year.
This was the last of the four
Toys R Us (Revell/ Cine models/Polar Lights) reissues that came out this
year.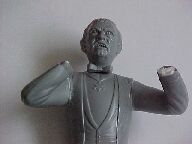 I stuffed pieces of kleenex into his hand
holes. This will keep primer and paint from getting down in there and maintain
a clean glue surface when I insert his hands.
I stuffed pieces of kleenex into his hand
holes. This will keep primer and paint from getting down in there and maintain
a clean glue surface when I insert his hands. For the ring portion, I used my awl
to open up the hole, and while it was on there, gently sanded the flash
from around the band.
For the ring portion, I used my awl
to open up the hole, and while it was on there, gently sanded the flash
from around the band.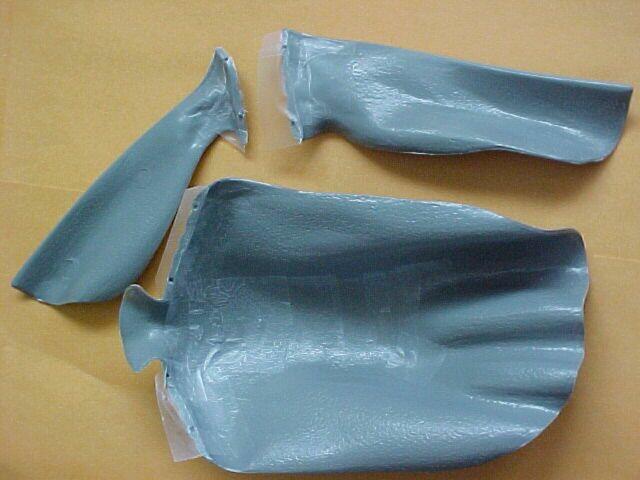
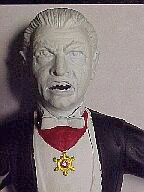 I have a bunch of Marvy METALLIC Gel Roller
pens. From white to silver, gold, red and blue. Using the gold, I pen in the medallion,
with a touch of silver in the middle of the red center, and that's done!
I have a bunch of Marvy METALLIC Gel Roller
pens. From white to silver, gold, red and blue. Using the gold, I pen in the medallion,
with a touch of silver in the middle of the red center, and that's done!
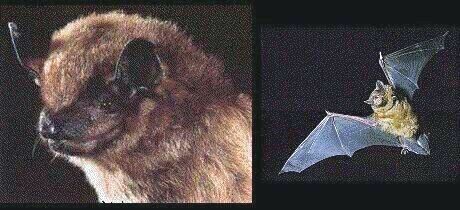 Did some checking on the web and pulled
down these photo's. Mainly looking to see how the wings can be painted to
give that thin membrane look, and shades on the fur.
Did some checking on the web and pulled
down these photo's. Mainly looking to see how the wings can be painted to
give that thin membrane look, and shades on the fur.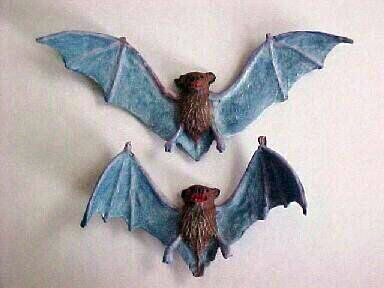
 Go back and paint the Spider black with two small red triangles
...might as well make her a Black Widow.
Go back and paint the Spider black with two small red triangles
...might as well make her a Black Widow.